In today’s post, I will show you how to add an email signature on the Gohigh level.
Why Is Email Signature Very Important:
Ravi Abuvala, who owns a $25 million online marketing agency, saw his click-through rate (CTR) double when he used email signatures in his campaigns.
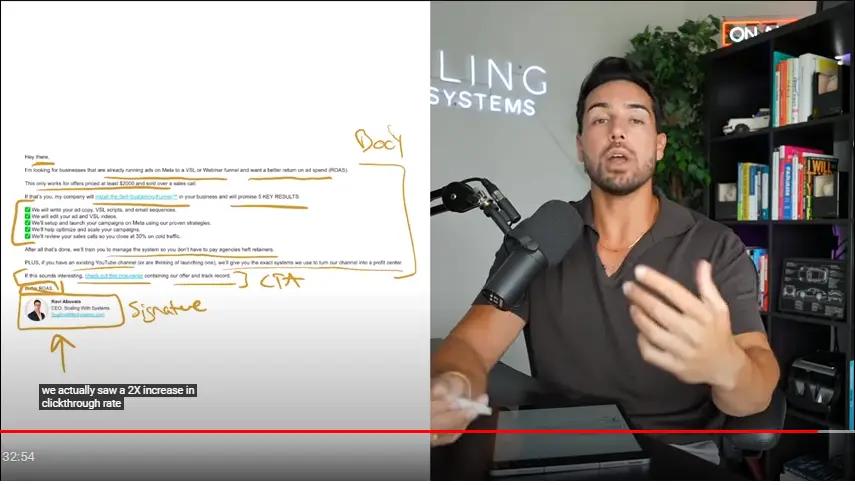
Email signatures help reinforce your brand with every email, making it more likely that people will click on your links.
Now, let me show you how to create an email signature on GoHighLevel.
How to Add an Email Signature in GoHighLevel
This guide will show you how to add an email signature to your email campaigns.
Here’s how to assign signatures to other team members on GoHighLevel, so their emails will automatically include the email signature.
Set Your Email Signature in Email Campaigns
Here’s how to achieve this…
Step 1: Log into Your GoHighLevel Account:
First, you need to log into your GoHighLevel account.
If you don’t have an account yet, you can sign up for a free trial on their website.
Once logged in, you will be directed to the dashboard.
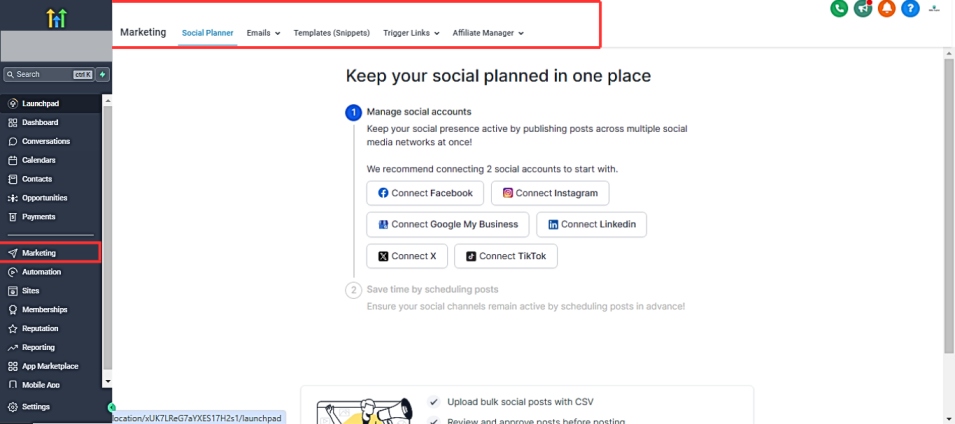
Once you sign up, Navigate to your sub-accounts
From the sub-account dashboard, navigate to the Marketing section.
Here, you’ll find various tools and options for your marketing campaigns.
Click on Email Marketing to access the email builder.
Step 3: Create or Edit an Email Template
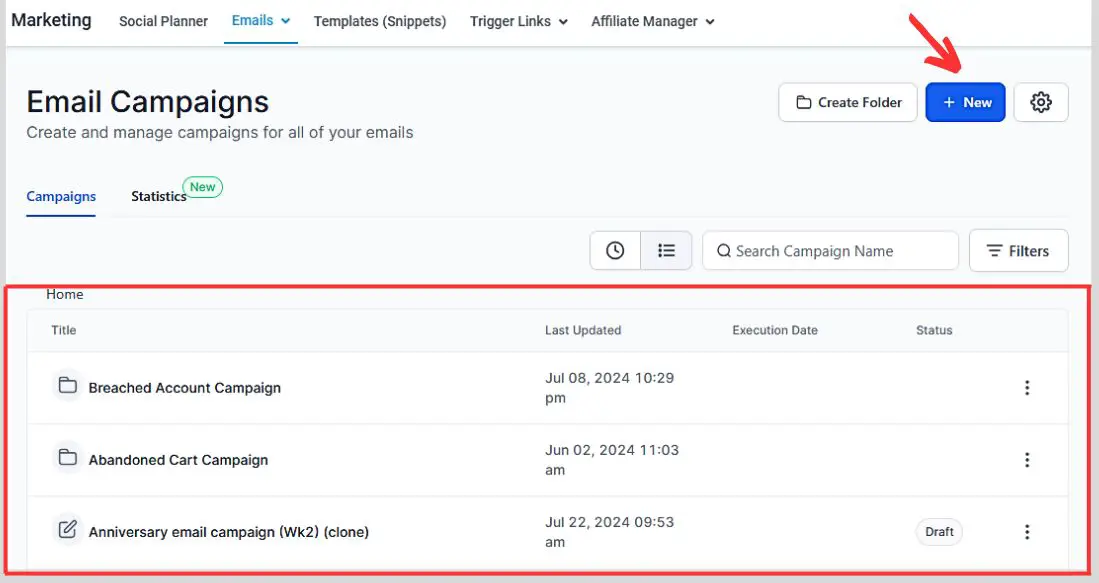
You can either create a new email template or edit an existing one.
To create a new template, click on the Create New Email button.
To edit an existing template, select it from the list and click on the Edit button.
Step 4: Access the Signature Section
In the email builder, you will see various elements GHL offers that you can add to your email template.
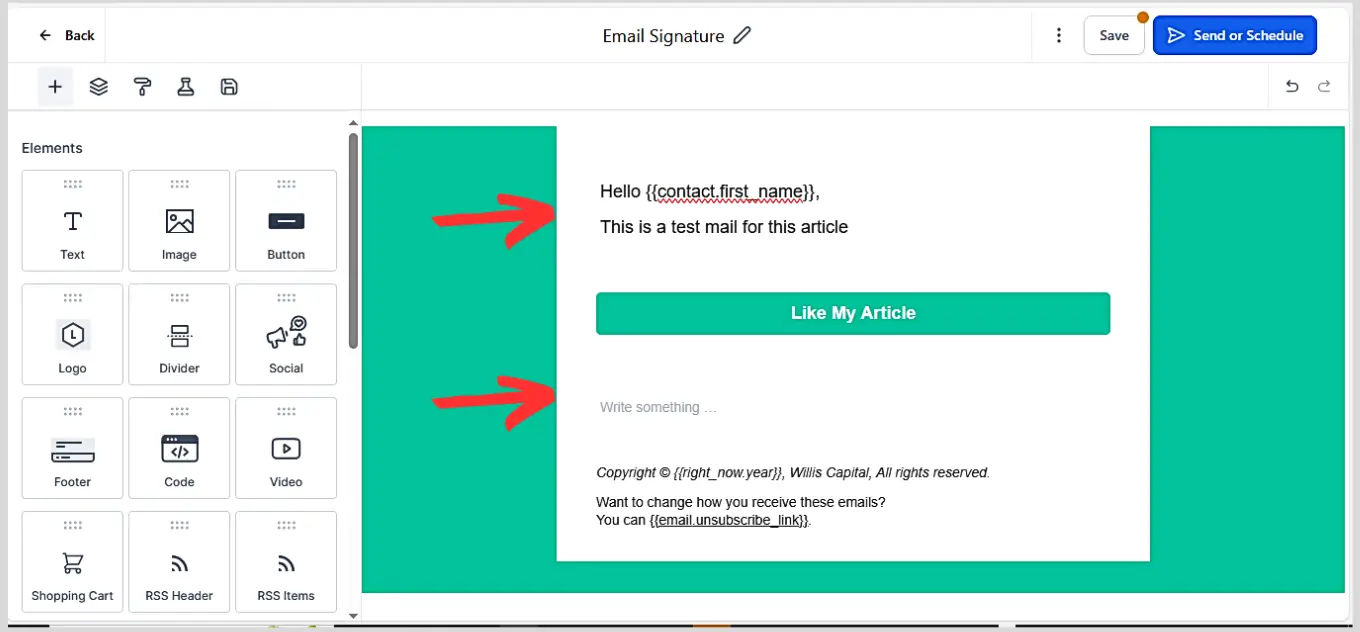
Ensure to write your texts, and emails ready to fly and click on any of the box sections you want to add your email signature to.
Click on “custom values” and search for “user/signature“.
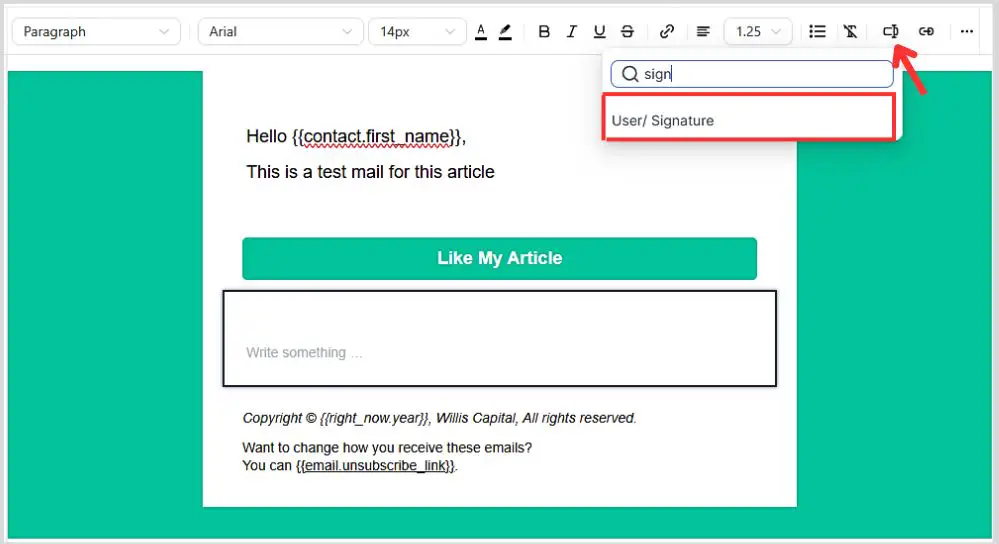
Click on it, and it will be added to your block of text.
Note: Make sure the account user/staff you are using to send these emails already has an email signature assigned to it.
In case you don’t know how to do it, here’s how:
How To Assign Email Signature To Staff/User On GHL
- GHL settings> My Staff
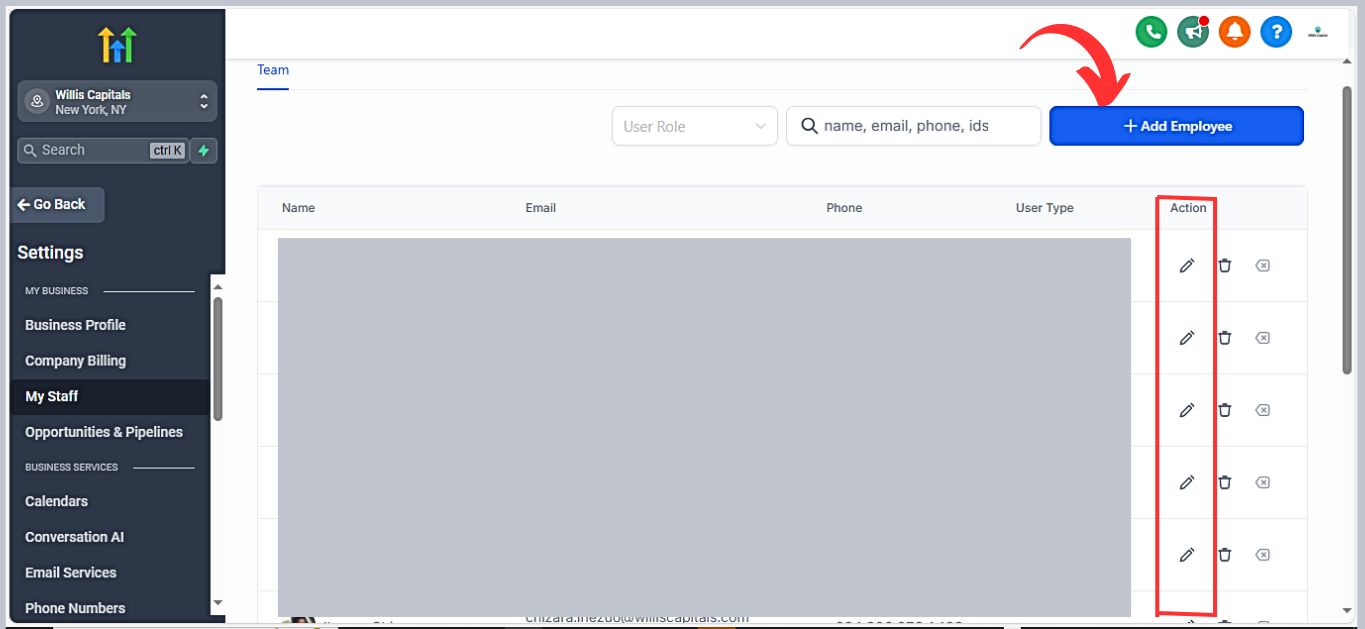
- You can add an employee/staff or edit an employee’s/staff’s existing details (to assign an email signature to an employee)
Customize Your Email Signature
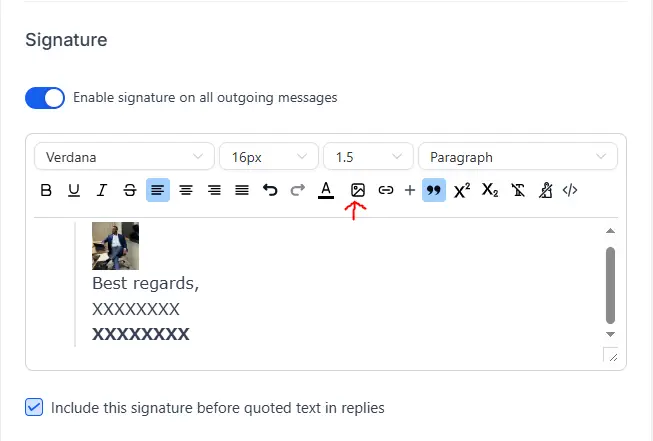
Click on the Signature section to open the customization options.
Here, you can add your name, job title, company name, contact information, and any other details you want to include.
You can also add images, such as your company logo or a professional headshot, to enhance your signature.
Format Your Signature
GoHighLevel allows you to format your email signature to match your brand’s style.
You can change the font, color, and size of the text, as well as adjust the alignment and spacing.
Make sure your signature is clean, professional, and easy to read.
Save Your Changes
Once you are satisfied with your email signature, click on the Save button down below to apply the changes to your email template.
Tips for a Professional Email Signature
1. Keep it Simple: Avoid cluttering your signature with too much information. Include only the essentials.
2. Use Consistent Branding: Ensure that your signature aligns with your brand’s colors, fonts, and overall style.
3. Add Social Media Links: Include icons and links to your social media profiles to make it easy for recipients to connect with you.
4. Include a Call-to-Action: If appropriate, add a brief call-to-action, such as a link to your latest blog post or a special offer.
5. Test Your Signature: Send test emails to yourself and your colleagues to ensure that your signature displays correctly across different email clients and devices.
Rounding Up.
Adding an email signature in GoHighLevel is a straightforward process that enhances your professional image and reinforces your brand with every email you send.
By following the steps outlined in this guide, you can create a polished and effective email signature that leaves a lasting impression on your recipients.
For more tips and tutorials on using GoHighLevel, be sure to check out our blog and stay updated with the latest features and best practices in digital marketing.
